




Quick answer: Choose a target bitrate for your delivery platform, resolution and frame rate, then check a demanding section of the exported video. Target bitrate is the average video data budget you aim for. With variable bitrate encoding, the maximum controls how high that budget can rise for demanding moments. A bigger number creates a larger file, but does not automatically make a visibly better export.
This guide focuses on choosing the numbers. For the export process itself, see our Premiere Pro export walkthrough.
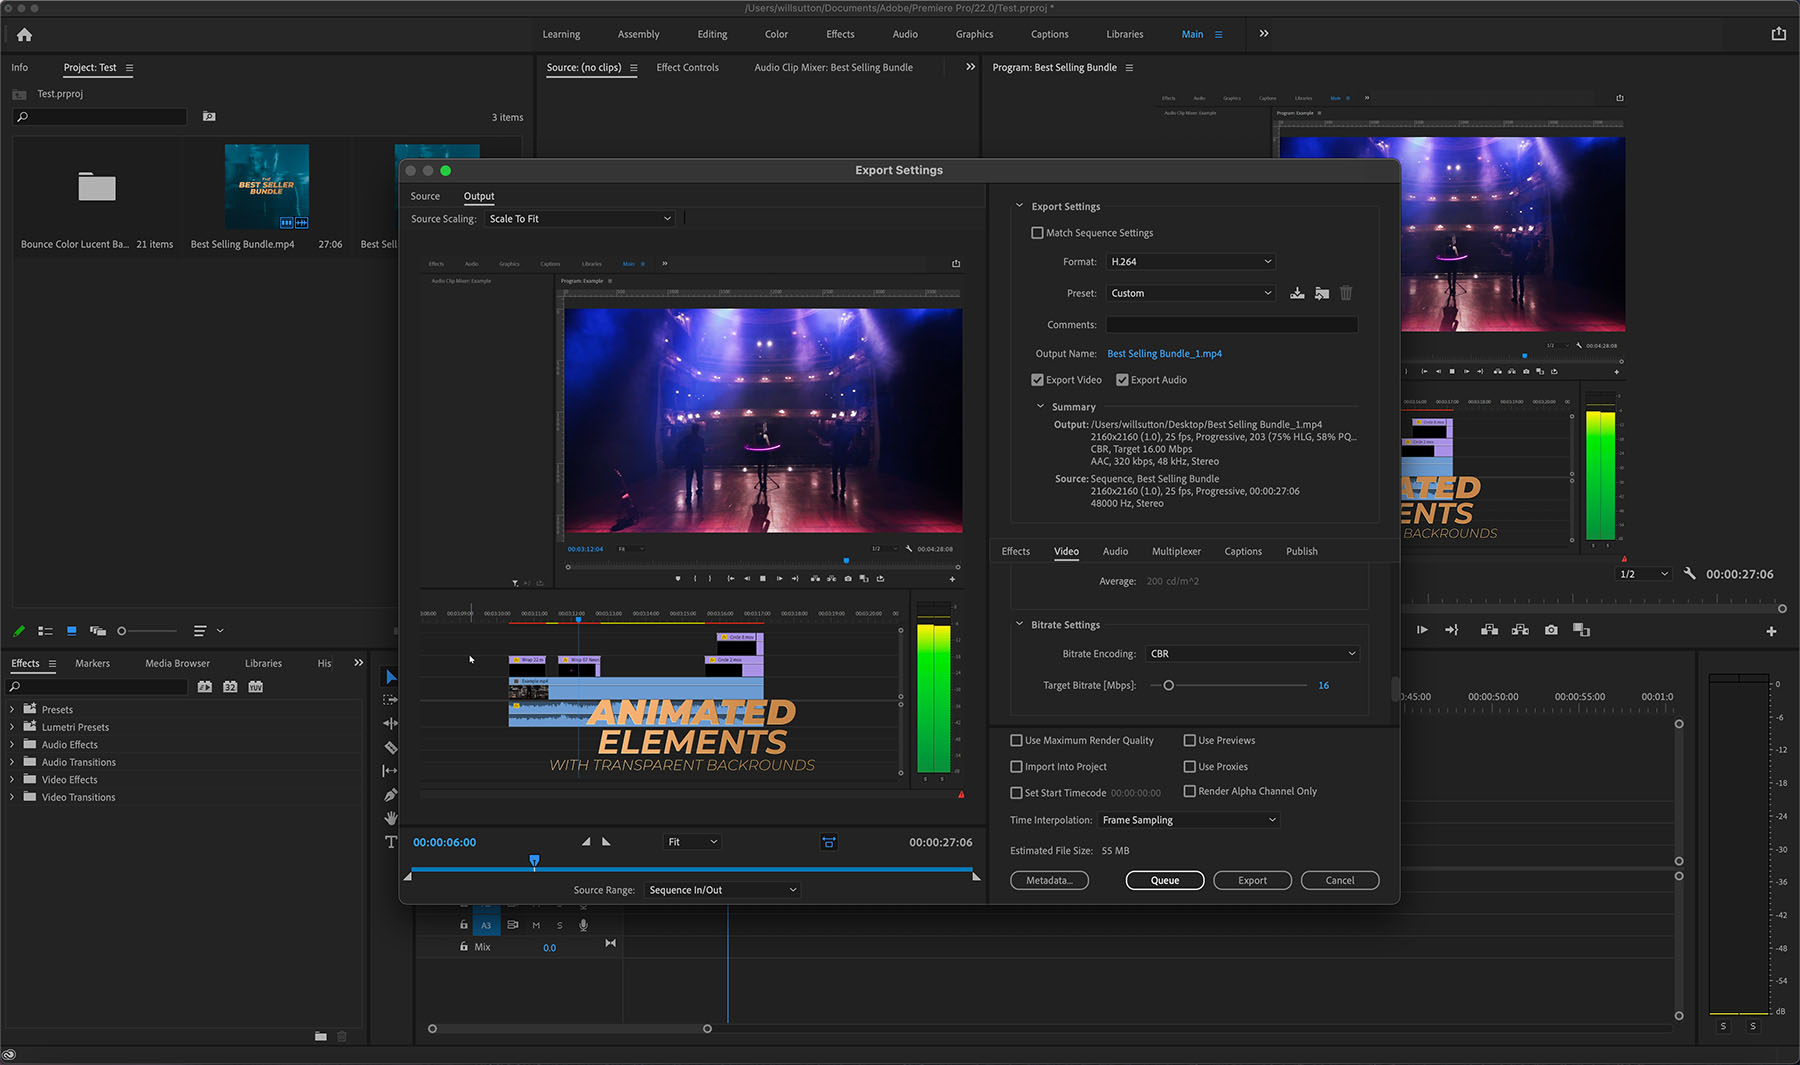
What is the difference between target and maximum bitrate?
Target bitrate sets the overall video data rate you are aiming for; maximum bitrate limits the peaks when using VBR. Both are measured in megabits per second, or Mbps.
| Setting | What it controls |
|---|---|
| Target bitrate | The intended average video data rate and much of the file size budget. |
| Maximum bitrate | The permitted peak data rate with variable bitrate encoding, where this control is available. |
| Audio bitrate | A separate contribution to the final file size, usually shown in kbps. |
Adobe explains these controls in its export settings reference. Available options depend on the format and encoding configuration. If a maximum field is absent, do not assume your export is broken.
Think of a locked interview shot followed by confetti filling the frame. A variable budget can give the busier moment more data. Raising only the maximum does not tell the encoder to spend that amount throughout the whole video.
What target bitrate should you use for YouTube?
For a YouTube SDR upload, use YouTube’s resolution and frame rate recommendations as a starting point, then inspect your export.
| SDR resolution | 24, 25 or 30 fps | 48, 50 or 60 fps |
|---|---|---|
| 1080p | 8 Mbps | 12 Mbps |
| 1440p | 16 Mbps | 24 Mbps |
| 2160p, or 4K | 35 to 45 Mbps | 53 to 68 Mbps |
These are YouTube’s recommended video bitrates for SDR uploads, checked in October 2026. They are upload recommendations, not universal maximum settings or live streaming settings. YouTube lists different values for HDR.
A client delivery specification takes priority over this table. For a different platform, check that destination’s requirements before copying a YouTube preset.
How can you estimate the exported file size?
Multiply the combined video and audio bitrate by the duration, then divide by eight to estimate the file size in decimal megabytes.
Estimated MB = (video Mbps + audio Mbps) × seconds ÷ 8
The following calculations use a 60 second video and 320 kbps audio, which is 0.32 Mbps. These are arithmetic examples, not measured exports or an audio recommendation for every destination.
| Video target | Duration | Estimated size including audio |
|---|---|---|
| 8 Mbps | 60 seconds | 62.4 MB |
| 12 Mbps | 60 seconds | 92.4 MB |
| 40 Mbps | 60 seconds | 302.4 MB |
For a 100 MB limit on a 60 second clip, a 12 Mbps video target leaves some room beyond the calculated 92.4 MB. The container adds overhead and the encoder may not land exactly on the target, so always check the completed file. Leave more room if a receiving system applies a strict limit.
Maximum bitrate is not the right number for this average size calculation. A maximum of 20 Mbps does not mean every second will use 20 megabits.
Should you choose CBR, VBR 1 pass or VBR 2 pass?
Choose an encoding mode that fits the delivery requirement and the time you have for the export. CBR maintains a constant data rate. VBR adjusts the rate with scene complexity; two passes add an analysis pass and take longer.
- CBR: Use it when the receiving specification requires a constant rate.
- VBR 1 pass: A practical first comparison export when you want a result quickly.
- VBR 2 pass: Consider it when the option is available and you have time to compare the result at the same target bitrate.
Do not change the encoding mode, resolution and bitrate all at once while judging quality. You will have trouble identifying which change helped.

How do you check bitrate after colour grading?
Export a short section containing the hardest detail in your finished grade, then compare it with the timeline and a second bitrate setting.
- Choose 10 to 20 seconds with movement, fine texture, a smooth sky or dark gradients. Include any grain you intend to deliver.
- Keep the codec, resolution, frame rate, colour settings and encoder unchanged between comparisons.
- Export at your starting target, then at a higher target that still fits the delivery requirements.
- Watch at normal speed and inspect troublesome frames at the intended viewing size. Look for blocks, smeared detail and unstable texture.
- Choose the smaller file if the larger version offers no useful visible improvement. Check the platform’s processed upload too.
This is a suggested comparison method, not a claim that we tested your footage. Our guide to pairing film grain with cinematic LUTs helps you decide how much texture the edit actually needs.
A uniform colour or brightness shift deserves a separate colour management check. Increasing bitrate is not a replacement for matching the sequence, export and viewing conditions. Likewise, bitrate does not select colour bit depth: read our 8 bit versus 10 bit colour guide if those settings are getting mixed together.
Open the Premiere Pro export walkthrough
Can you see a bitrate preset demonstration?
This short video from the independent channel Adobe in a Minute demonstrates bitrate presets in Premiere Pro. It was published in 2019, so the interface is older; use the current written references above for delivery recommendations.
Watch the bitrate preset demonstration on YouTube.
Related questions about Premiere Pro bitrate
Should target and maximum bitrate be the same?
They do not need to match. A higher maximum gives VBR room for peaks. Follow any delivery ceiling and test the result rather than applying a fixed multiplier to every project.
Should export bitrate match the camera recording bitrate?
No. A camera recording and a delivery file can use different codecs, resolutions and compression settings. Choose the export for its destination instead of copying the camera’s number.
Can you use the same bitrate for 1080p and 4K?
You can enter the same number where the controls allow it, but 4K has more pixels to represent. Start with the destination’s separate recommendations and compare the actual output.
Why is the actual bitrate lower than the target?
A target is not a promise of an exact file size. Check whether the reported figure is video only or includes audio, and confirm the preset retained your settings. Simple scenes and the encoder’s rate control can also affect the result.
Will higher bitrate fix footage that looks washed out?
Do not assume it will. Check colour interpretation, export colour space and the player first. A higher data budget cannot substitute for a correct colour workflow.
Does a higher bitrate turn an 8 bit export into 10 bit?
No. Bitrate describes the data rate. Bit depth describes the available tonal precision. The export format and codec settings must support the bit depth you want.


