Filmora + LUTs
Filmora is one of the fastest growing editing software for beginners and intermediates. It boasts some professional features while yet being one of the easiest user interfaces to use.
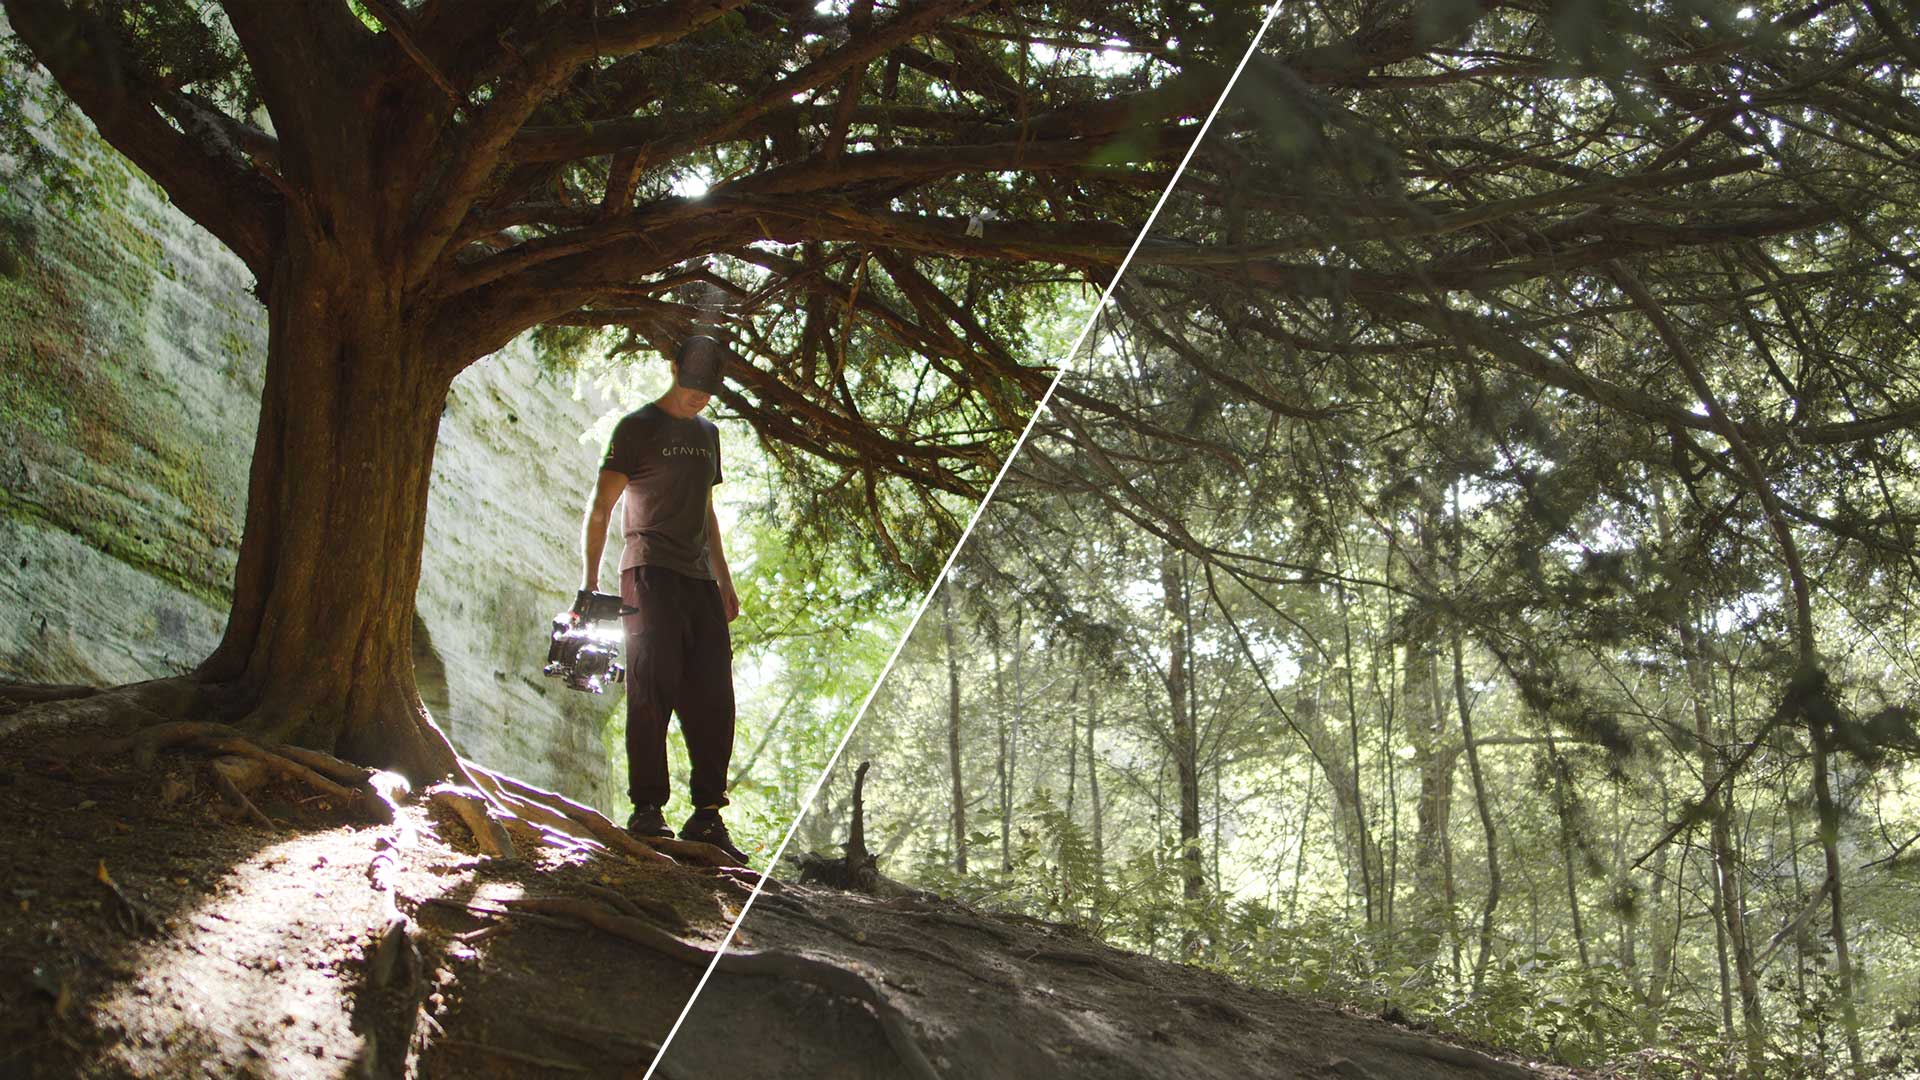
If you are unsure what a LUT is, in simple terms, LUTs are color presets that are compatible in nearly all editing software. All they simply do is carry a set of color values, changing one set of colors to another. They are used by many professionals for tasks including color correcting, color grading, monitor calibration, transferring colors between software and much more.
Here you can find a variety of conversion and creative LUTs, crafted by our team of Filmmakers and Colorists.
Important Guidelines Before Using LUTs
- Ensure white balance is correct when using LUTs! This will dramatically change the look of the LUT.
- Ensure your exposure is correct when using LUTs. You can use a histogram to help in camera or editing software.
- When using LUTs, your footage may need small adjustments to get optimal results, such as exposure, saturation, contrast, etc. depending on your preference.
- Shooting conditions such as lighting, weather, locations etc. can vary which can drastically affect a LUTs look. Some LUTs will work better in different scenarios. It’s best practice to experiment with which LUTs work best for your style and scenes.
Download a sample pack of our Creative LUTs here:
If you do not receive an email, please check your spam folder. If you still have not received it, then please contact us and we are always here to help.
How to add LUTs in Filmora:
Filmora is pretty straight-forward, it does not require a lot of in-depth knowledge or advanced skills to use. Follow the steps below to import your LUTs and get creative with your work.
View our LUTs CollectionVisual Process | Apply a LUT in Filmora in 10 Seconds
Written Instructions:
1. Import your video
Drag and drop your video into your timeline then click on the video so it is selected.
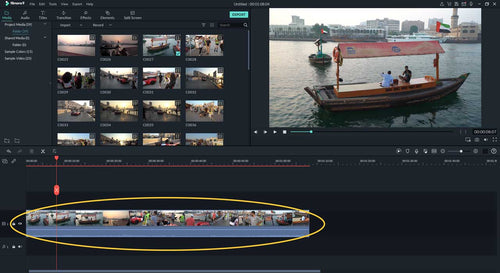
2. Click on 'Tools' then click 'Color Correction'
Click on the 'Tools' (Circled in the image below) and then click 'Color Correction', this will load a window where you can import LUTs.

3. Click the '3D LUT' arrow.
This will open up the LUT importer drop-down.
Note:
For this 3D LUT, you can adjust the Color, Light, HSL or add a Vignette and you can save any such adjustments as a user preset for future use.
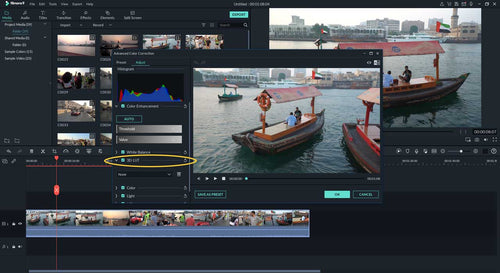
4. Click the drop-down and then click 'Load new LUT'.
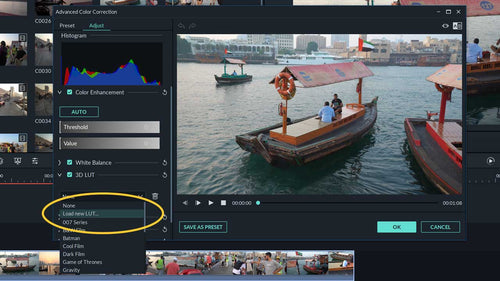
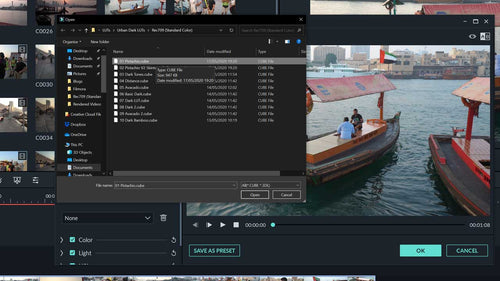
You can now select your LUT. LUTs featured in this example are the Urban Dark LUTs created by Bounce Color.
5. Click OK
Once yo uhave selected the LUT, click the 'OK' button.
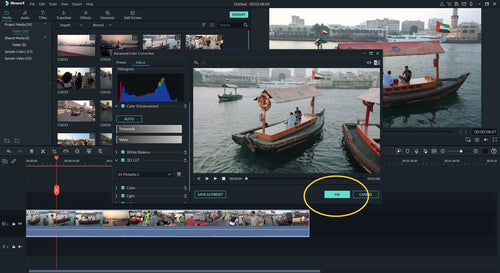
You are done! Have fun using the LUTs!
Note:
As every video is different (exposure, white balance, etc.), small adjustments are recommended to achieve an optimal result. Please ensure your White Balance is correct before applying a LUT. This can drastically change the look of the LUT.


