

How to use LUTs in Edius Pro
New & Updated 2021


LUTs are one of the best ways a videographer has in order to develop a style and start doing something unique. Because of this, it’s very important to know how to use LUTs in Grass Valley’s Edius.
Finding your style can be hard, but with the right LUTs and editing tools on hand, you will be able to create something spectacular, in a very short time.
Important Guidelines Before Using LUTs
- Ensure white balance is correct when using LUTs! This will dramatically change the look of the LUT.
- Ensure your exposure is correct when using LUTs. You can use a histogram to help in camera or editing software.
- When using LUTs, your footage may need small adjustments to get optimal results, such as exposure, saturation, contrast, etc. depending on your preference.
- Shooting conditions such as lighting, weather, locations etc. can vary which can drastically affect a LUTs look. Some LUTs will work better in different scenarios. It’s best practice to experiment with which LUTs work best for your style and scenes.
Download a sample pack of our Creative LUTs here:
If you do not receive an email, please check your spam folder. If you still have not received it, then please contact us and we are always here to help.
How To Use LUTs In Edius
Edius is a very straight forward software you can use for video editing and in it, you basically have everything you need. When it comes to LUTs, this one is a little more complicated.
1. Download and unzip your LUTs
In order to be able to load new LUTs, you first need to download some packs you like and extract them to an easy-to-reach location. The software will only load unzipped files, and you may want to keep track of all the LUTs you have.
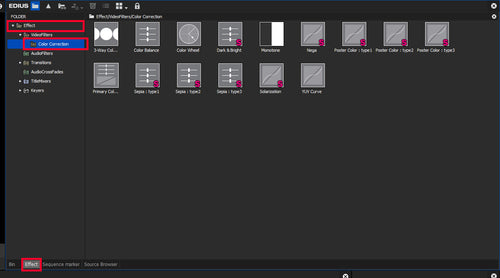
2. Open the “Color Correction” tab
In order to add a LUT, you first need to find the 'Color Correction' tab From there, you can load all the files you need when it comes to presets and look-up tables.
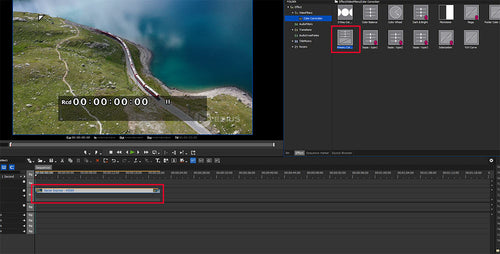
3. Apply a “Primary Color Correction” effect
What you need to do now is drag and drop the 'Primary Color Correction' effect on your footage.
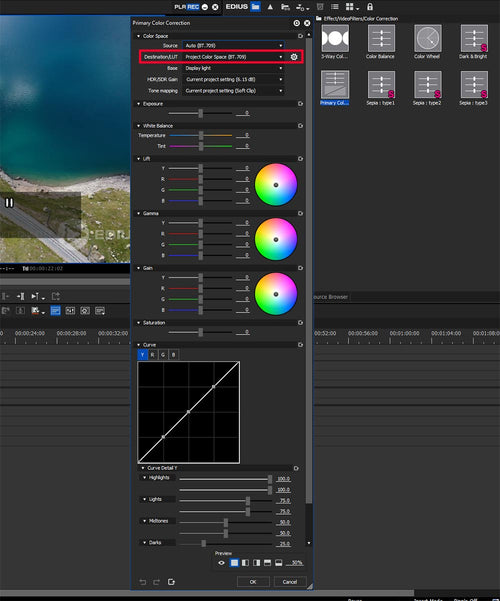
4. Change The 'Destination LUT'
In order to select your new LUT, you may want to open the settings of the effect you just applied, and change its destination to the file you extracted in the first step.
5. Confirm Your Changes
After you’re done, the only thing you need to do is finish the LUT setup, and click ok. Your new LUT is set up, and you can start creating more and more!
If you encounter any problem with your LUTs, let us know. You can do it by sending us an email using the form on the contact page.
Note:
As every video is different (exposure, white balance, etc.), small adjustments are recommended to achieve an optimal result. Again, please ensure your White Balance is correct before applying a LUT. This can drastically change the LUTs look.