About Vegas Pro
Talking about LUTs and color gradient, it’s very important to be able to use your favourite settings across all the video editing programs you may use. Today, we’ll tackle a look at how to use LUTs in Vegas Pro, and how you can really have your signature look everywhere.
LUTs are generally used in order to enhance videos, and from there, you can create your own style, and have everyone know that you created that footage. These look-up tables are super easy to use and will make any video absolutely amazing.
Important Guidelines Before Using LUTs
- Ensure white balance is correct when using LUTs! This will dramatically change the look of the LUT.
- Ensure your exposure is correct when using LUTs. You can use a histogram to help in camera or editing software.
- When using LUTs, your footage may need small adjustments to get optimal results, such as exposure, saturation, contrast, etc. depending on your preference.
- Shooting conditions such as lighting, weather, locations etc. can vary which can drastically affect a LUTs look. Some LUTs will work better in different scenarios. It’s best practice to experiment with which LUTs work best for your style and scenes.
Download a sample pack of our Creative LUTs here:
Get Free LUTsHow To Use LUTs In Vegas Pro
1. Download and unzip the LUT
The first step is to find yourself some LUTs you like. After that, download them, and extract the files in a location that’s easily accessible for you. The LUT must go well with your project and if you’re not sure, you can always check out our collection.
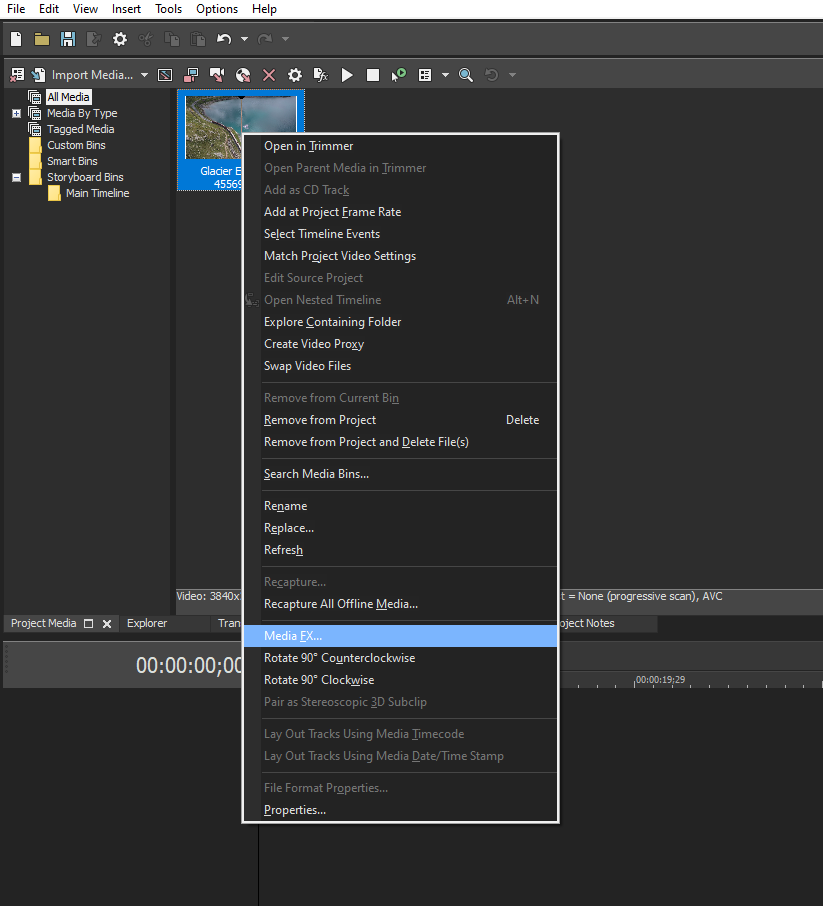
2. Open the 'Media FX' tab
From the project manager, you can right-click on any footage in order to open the 'Media FX' tab. From there, you will be able to import LUTs into Vegas Pro.
3. Add the Vegas 'LUT Filter'
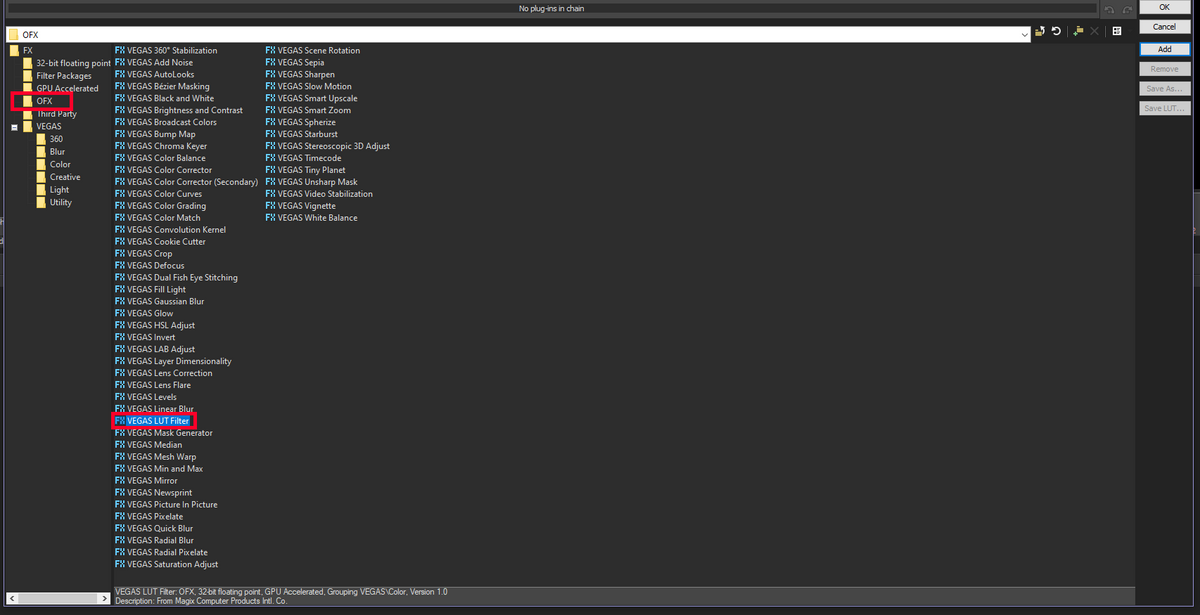
From the 'Media FX' panel you can install plug-ins for your program, so go ahead and install the 'Vegas LUT Filter'. You can find it in the 'OFX' tab.
4. Add your LUT
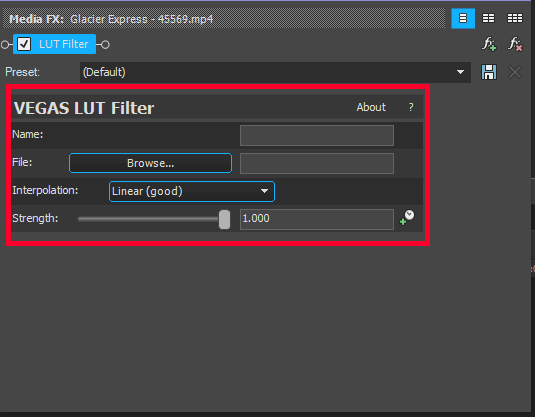
In the next tab that opens, you can create a new LUT preset. Choose a name, and import the file you extracted in the first step of this tutorial.
5. Apply your LUT
Now that everything is set, you can apply the preset containing the LUT to any project you need. It’s super straightforward, and you can save a lot of time when editing.
By using this method you can apply the LUT to one video, or the whole timeline in order to maintain consistency.
It’s quite easy to use LUTs in Vegas Pro, but if you do have any problems, you can always reach out to us either by email at support@bouncecolor.com or by using the form on the contact page.
Note:
As every video is different (exposure, white balance, etc.), small adjustments are recommended to achieve an optimal result. Again, please ensure your White Balance is correct before applying a LUT. This can drastically change the LUTs look.
Free LUTs
You can get some free LUTs from us here!


