

30 Dec 2021
Color Grading vs. Color Correcting - Everything To Know

There's usually a bit of confusion when it comes to comparing the two. Some people who aren't involved in the space can easily get them mixed, but they are actually quite different and compliment each other.
Basically, both color grading and correcting are done in post-production. Color correcting fixes and matches all the footage, while color grading adds a stylish look to portray a specific feeling. I will go into more depth below on the processes involved.
How to do the color correcting process
Color correcting occurs before the color grading process. The main aim for color correcting is to get all the footage corrected to a natural real-life look and make sure all the clips match each other perfectly. After this process, the footage is ready to go to color grading where it will be much easier to add the stylish look on top of the perfected footage.
It's important the settings such as the white balance and exposure match between shots because this can drastically change the look of the footage. If the white balance is slightly off on one of the shots, it can completely shift the skin tones or any other color.

Steps in color correcting
Correcting Log footage
Log footage is a professional color space used in many cameras. It’s a feature that has been introduced from the film world into the semi-pro and amateur world. Pretty much most decent cameras on the market today can use Log color spaces.
They are used on cameras to gain more dynamic range and capture more detail in the shadows and highlights. This means that it reduces the chance of clipping on either end. Ever tried to film on a bright sunny day and some of the sky is overexposed when the ground is in exposure? Log footage helps prevent this.
The only problem with Log footage is that it looks really flat and if you aren’t using a histogram in-camera, it’s hard to judge the correct exposure. This means when you get to the color correcting, you will need to make some slight adjustments for this shot to match the others.
All Log footage looks like it has no contrast, is very grey and has no color. The data is there in the footage, you will just need to enhance these yourself while color correcting to bring the colours and contrast back to look as natural as possible.
White balance
White balance is a tough one. It’s best practice to get this right while shooting. Most semi-pro or amateur cameras do not shoot video in RAW format. RAW format essentially saves the meta-data from shooting so you can edit it afterwards. That includes saving the white balance information.So if you aren’t shooting in RAW, you need to do your best to get the white balance correct while shooting. You can adjust it afterwards in the color correcting process but sometimes it can look a bit funky.
If you are shooting RAW, then you are able to adjust the white balance in post-production easily. Just make sure that all the shots in the same scene have the same white balance.
Having the wrong white balance can literally change the look of your shot entirely and you need to make sure you get this right in the color correcting process. Especially if you are using LUTs to do an overall color grade on your footage. If one shot has a slightly different white balance, it will make that one shot look completely different to the others.
Exposure
Exposure is just as important as white balance. If the exposure is different to the other shots in your scene, it will stick out like a sore thumb.
Correct your exposure using the scopes and histogram. Most decent editing software has these scopes, if they don’t, I would recommend you upgrade to some better software. See our blog on the best video editing software here.
Using scopes
Scopes are important to make sure all your tones and luminance are correct. It’s not always about what looks good to the eye. Especially if you don’t have a proper colour-calibrated monitor. Learn why color calibrated monitors are important here. Luckily all built-in displays on Apple computers are calibrated great.
Scopes can help match shots perfectly. They also help to get the correct skin tones, exposure, color balance and much more.
Contrast & saturation
The aim is to get the footage to look as natural as possible, like real life. If you're shooting Log color spaces, then you will need to do more work in terms of this category. You can either use natural color correcting LUTs, or simply do it yourself using Curves, scopes or similar tools.
Skin tones
Skin tones are the most important thing to get right when it comes to coloring footage. When you see bad skin tones, it’s just like hearing bad audio, it puts you right off!
Luckily with professional coloring tools like DaVinci Resolve (which has a free version by the way), can help you correct your skin tones easily using scopes.
This process is more important for the color grading process too. But this is why in the color correcting princess we need to get the footage looking as natural as possible. Skin tones will look “off” if there is something wrong with the color correcting process.
How to do the color grading process
Color grading is the next step in the process to color correcting. It involves adding the stylish look onto the corrected footage.
This is where the creative fun happens. You can get experimental and try many types of things to see what takes your fancy or suits your theme of the film. Some rules to remember is that you need to maintain correct skin tones and don’t push your footage too far otherwise it will break down (having a high-end professional camera helps with this).
You can either color grade the videos yourself, or use a set of our Creative LUTs that are basically color grading presets to give your footage an overall style. You can learn more about LUTs here.
Steps in color grading
Explore the tools available
There are many tools available in most editing software. The most commons tools are:
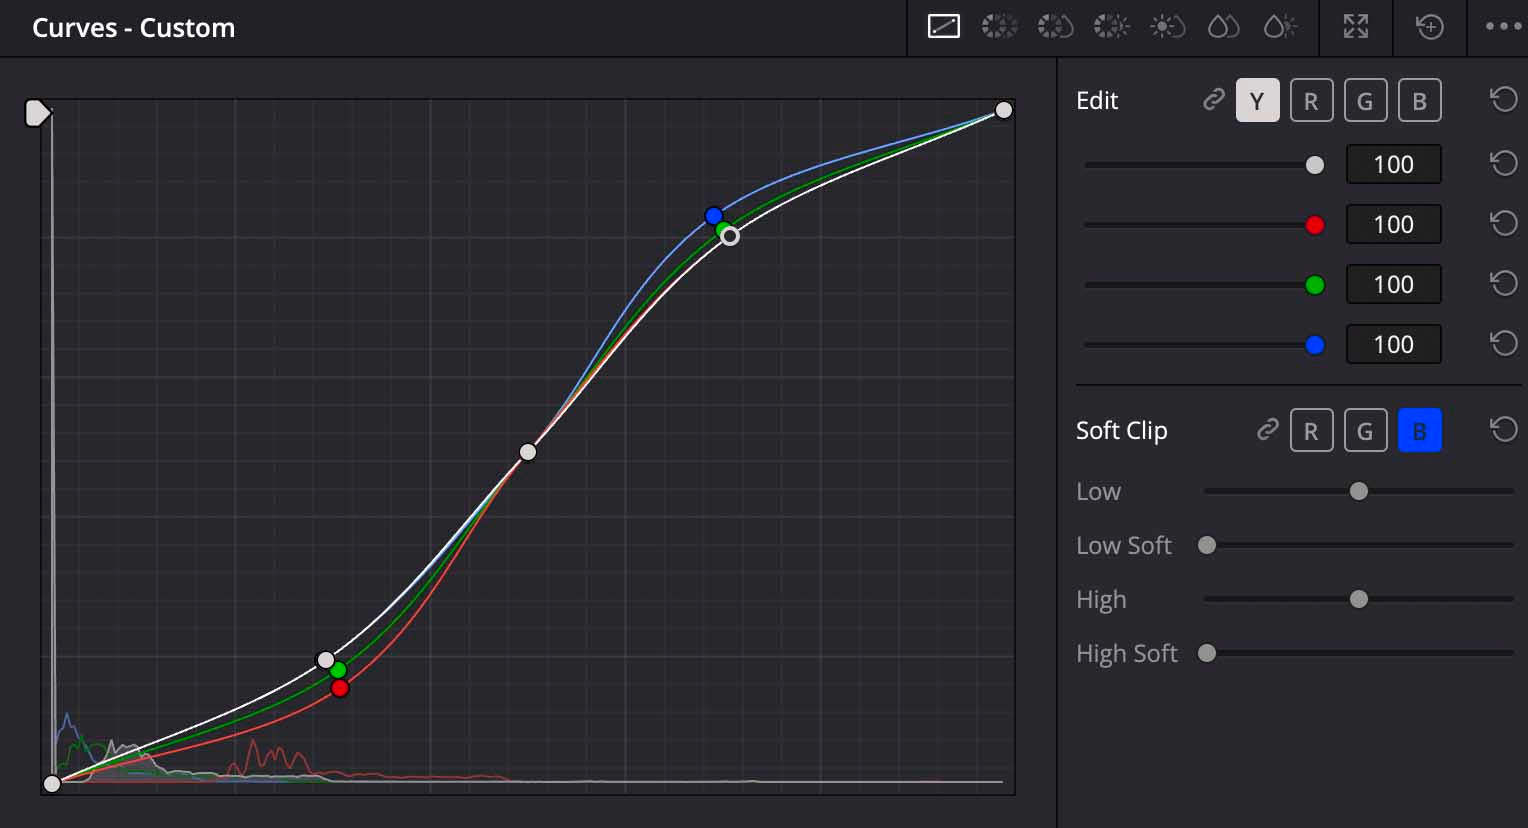
- Curves
- Saturation & hue adjustments
- Tone control
- White balance
- Color isolation
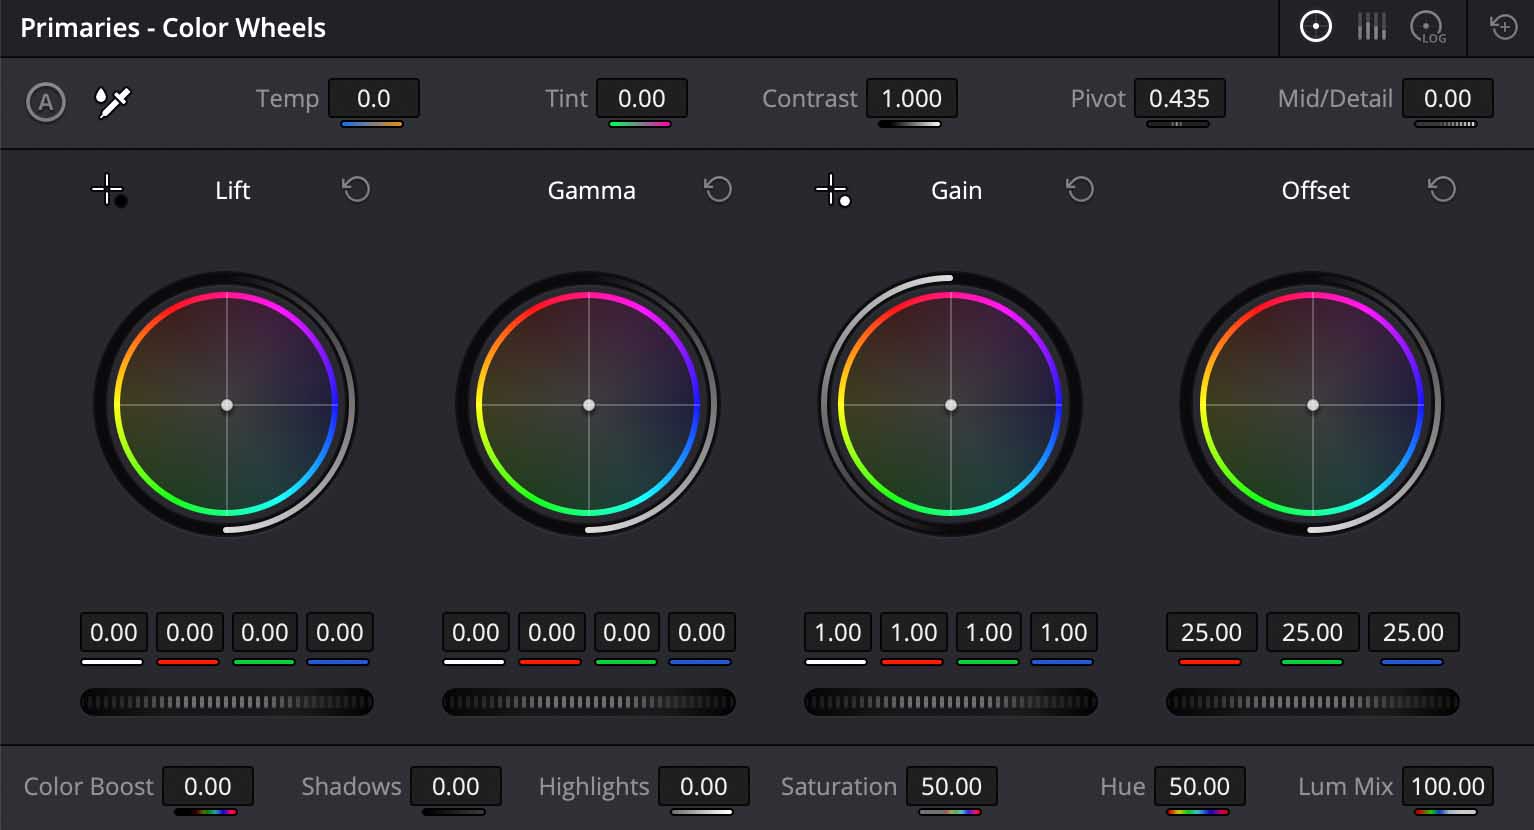
- Color wheels
Using these tools, you can achieve a huge range of styles. Especially using 'Curves', this tool is amazing to fix your levels, color balance, contrast and overall tone. Curves is one of the most popular color tools used in all decent editing software too.
Depending on the software you are using, explore the color tools available and see which ones you can work with. If you find your color tools aren't great, I would recommend moving to better software, or just using DaVinci Resolve to color correct and grade your footage.
Using LUTs
LUTs are a great method to adding a stylish look to your videos. Some people just don't have the skill to color grade manually or have the artistic eye to create beautiful colours. Color grading is an art in itself. This is why LUTs are perfect for most people. They are even used in calibrating monitors or on film sets to achieve specific previews.
I have gone into depth more about LUTs below under the title 'LUTs for using in most editing software'. Take a look to understand more about them.
See our best LUTs we've crafted here in case you're interested in giving them a go.
The best software for color correcting & color grading?
DaVinci Resolve
DaVinci Resolve is the leading software in the world for coloring your videos. It’s built by Blackmagic Design who is an astounding company in the camera world.
DaVinci Resolve is used by top professionals in the film industry. It’s been used on most films you would watch on TV today.
If you want to learn more about DaVinci Resolve, check out our DaVinci Resolve tutorials.

LUTs - Compatible in all editing software
If you want to take a slightly different route to color grading and correcting all the footage manually, you can use LUTs (Lookup Tables). They are essentially color presets that you place on your video to achieve a specific look or color correcting your footage.
They are amazing because they are compatible with nearly all editing software on the market. If they aren’t compatible with your software, then I would highly recommend getting rid of it and upgrading to better software. You can see my tutorial on the best editing software here.
We have a variety of color correcting LUTs and color grading LUTs we’ve crafted over the years. Take a look and see if any take your fancy. We also have some free LUTs if you’re interested.
LUTs have been around for many years now and are used in a variety of situations:
- Director monitors
- Monitor calibration
- Color correcting
- Color grading
- Transferring color between software
- Learn more about what LUTs are used for here
LUTs are perfect for people who struggle in the coloring process. Unfortunately, coloring videos isn’t for everyone and it’s more of a natural talent to get it right. It also takes a lot of time as you are essentially being an artist with the colors.
That’s why it makes life so much easier for videographers who need to cover the whole production process. For bigger productions with more money, they would usually hire a colorist in the color the film.
LUTs are perfect for YouTubers, Instagrammers, business owners, videography crews, enthusiasts, professionals for color correcting, grading and color calibrating, and much more.


Color Finale for FCPX
So I’ve met the Color Finale team, and they know their stuff so well. They created a plugin called Color Finale 2 and it’s fantastic.
Color Finale 2 is unfortunately only available for Final Cut Pro X though. So if you are an FCPX user, definitely check it out.

Other editing software
Other software such as Premiere Pro and AVID have their own color tools which are great, but nowhere near as good as DaVinci or the convenience of LUTs.
So you can still color your videos in other software, but just be aware that their color tools aren’t the greatest on the market and it’s probably best if you use DaVinci Resolve or LUTs to color your videos.


Summary
It's quite simple really, the difference between color correcting and color grading. Both of them compliment each other and need to be done.
If you're interested in any of the video editing assets we provide, take a look at our collection and see how they can improve your editing process.
Author
Will Sutton